Ah, the film clapperboard, the prized possession of the 2nd AC and an iconic image associated with the industry. When someone imagines a film shoot, they undoubtedly picture things like a huge camera, a boom mic, and a clapperboard; these are the things that tell the general public that movie magic is happening.
But what is the clapperboard and what does it do? This article will delve into the history, the purpose and the preferred use of the clapperboard, so if you are prepping for a short film shoot and someone has asked you to step-in, you’ll know just what to do.
Okay, we should probably get something out of the way first. The clapperboard can go by many names and the one on which most people settle is the ‘slate’. Therefore, there might be plenty of times in which we refer to the clapperboard as the slate in this article (and, indeed, in other articles). If you go to Wikipedia you might even notice that there are lots of other names that are in general use, but for now we’ll stick to clapperboard, clapper or slate. You have been warned!
What is the Clapperboard?
The clapper is the black and white board usually operated by the 2nd AC, which depicts a wide range of information pertinent to a particular shot. This information will be filmed along with the contents of a particular take so that it is easily identifiable to those working in post-production. Along the top of the clapper is a separate pair of sticks, which are attached to a hinge that can be levered open and closed to make the distinctive ‘clapping’ noise, which is important for the syncing of sound.
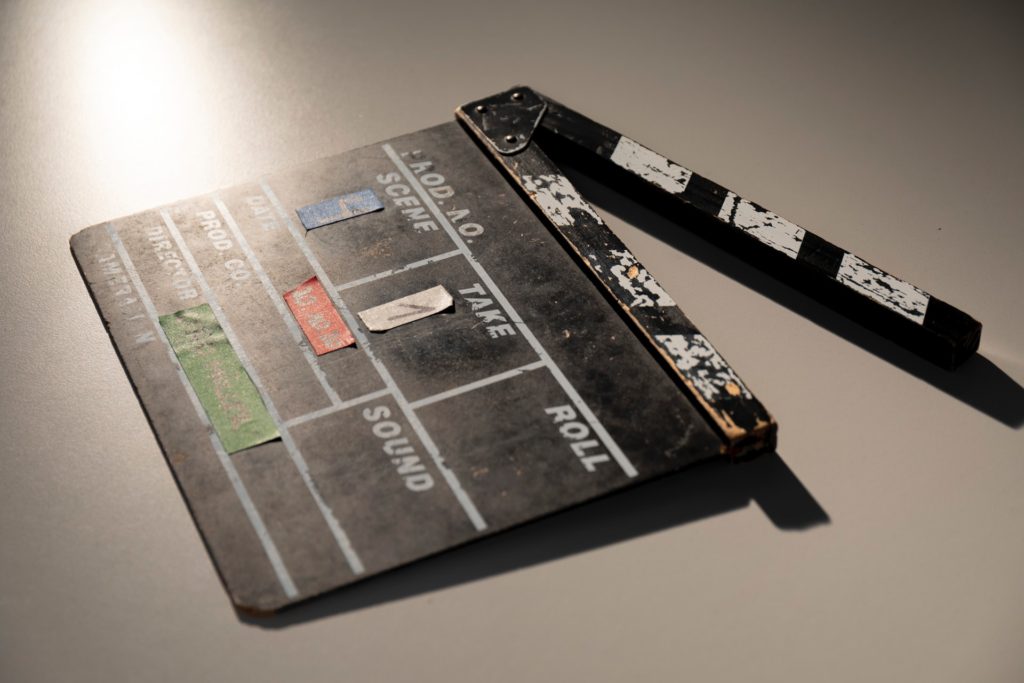
You’ve undoubtedly seen one before, whether it is on a film shoot, in a film store or even if you’ve ever watched behind-the-scenes footage of a particular motion picture. Depending on the age of said BTS footage, it will either be largely black or largely white. This is because old slates were small chalk-boards (made from slate) whereas modern film slates are small white-boards (made from plastic) that utilise dry markers. Additionally, modern slates usually have magnets between the tips of the hinged sticks running along the top, ensuring the ‘clapping’ sound is realised no matter how hard someone closes it.
Hopefully you’re still with us, but if you’re struggling then you can rest assured that we will be taking a closer look at some of these things throughout this article.
The History of the Clapperboard
Prior to the arrival of sound in film, it was still necessary to identify shots for the purpose of editing. However, as there was no need to synchronise this with any audio information it would have simply been a piece of slate, minus the hinged stick, that contained important shot information for the editor.
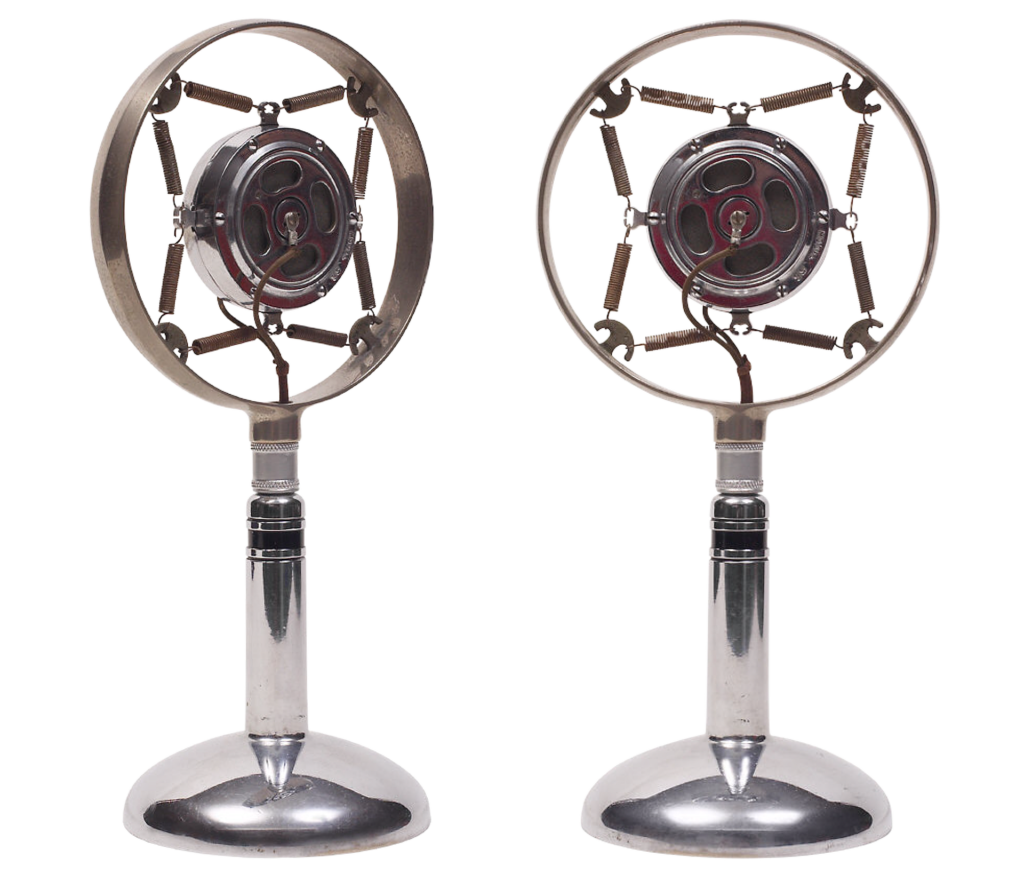
When sound emerged, however, the whole industry changed. So-called ‘talkies’ were a revolution that changed the job descriptions of actors, directors and beyond. But in addition to the obvious increase in dialogue and sound effects, there were also behind-the-scenes implications that required solutions.
One of those problems was attaching the soundtrack to the visual footage. As you might already know, sound is recorded separately to film and this was especially important in the early days of sound when cameras were incredibly noisy (fun fact: early film cameras would often be enclosed in sound-proof booths so as not to ruin the audio takes) so any audio equipment attached to the camera itself was a no-go. As a result of this, a method was required to easily sync the separately-recorded audio.
Enter the Australian film director; F. W. Thring, who created the afore-mentioned hinged sticks to create an obvious visual and audio cue that would make the process simple. This was originally a separate device to the slate, but eventually the two items merged into one and the iconic clapperboard was born.
Since then it has evolved with the times and a wide range of additions have been made. Early slates had much less information and as filmmaking became more and more complicated, more details were required.
The advent of colour film was one such complication; post-production might require the whole project to go through a process called ‘colour correction’ in which accidental tints or dark patches are refined so that they are consistent throughout the film. Modern film slates will therefore have a checkerboard of colours across the hinged section, which provides a base for a colour corrector to use during the process. (More often these days a separate dedicated colour checker card is used if calibration is important eg. visual effects work… as the slate is more likely to get dinged up and grubby which would throw off the colours)
Modern slates might also contain digital timers and clocks to further streamline the process of syncing and identifying footage.
Labels… So many labels...
Okay, so we’ve established that the clapperboard, or slate, has information upon it that identifies a given shot and take. But what exactly is this information? Let’s delve into those important numbers and abbreviations that will become a part of your world.
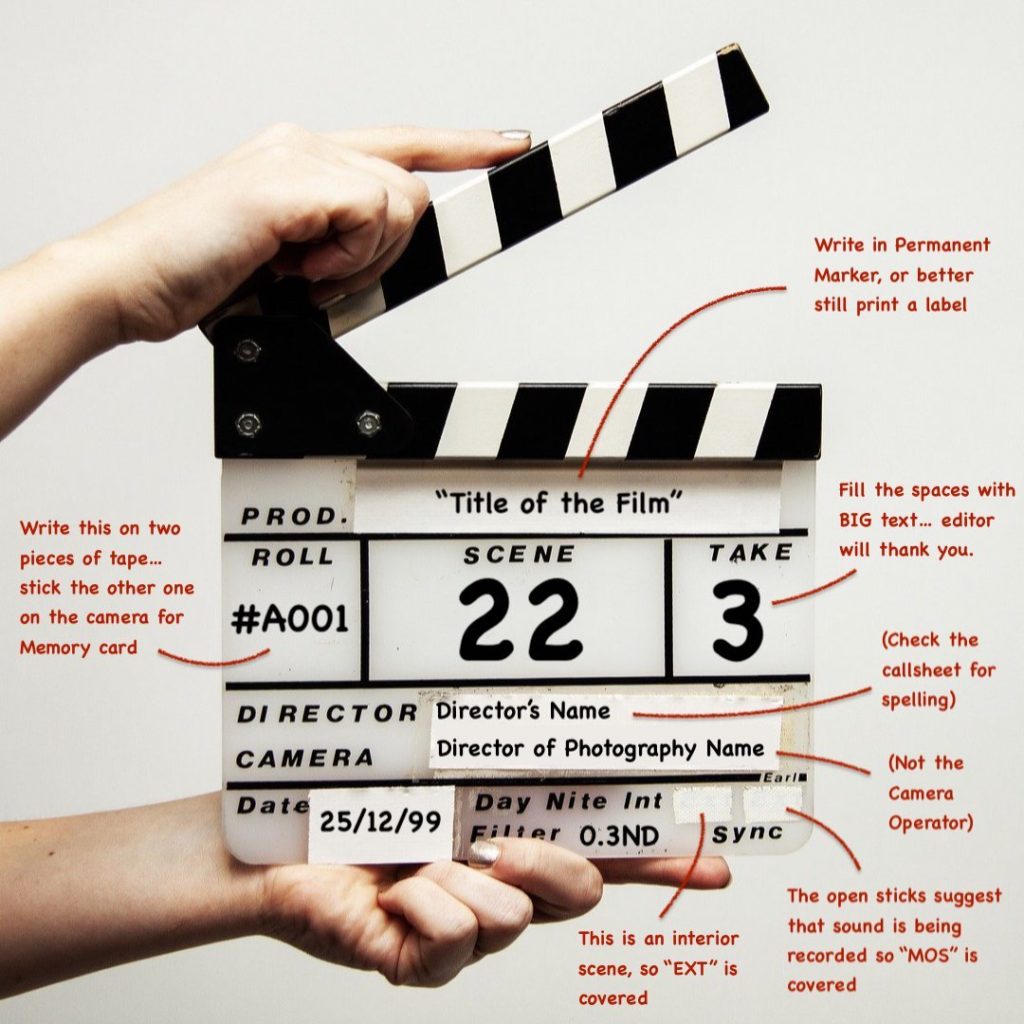
The top section of the clapperboard contains the name of the production (pretty technical stuff, I know) and whilst this can be written in the same white board marker as the rest of the slate (or with a permanent marker if you can spare the white spirit or isopropyl alcohol solvent to clean it later), it’s also nice to use a label maker to create a nice printed header for this section. The DoP will appreciate it. I’ve seen it happen.
Underneath the production title you will often see the roll number, the scene and the take, with some ACs adding their own section in the ‘scene’ section to add a shot number as well. The roll refers to the current film stock in use in the camera or, in the case of modern digital photography, the data card. So under roll you would normally see something like #A001 for the first card, which ascends through #A002 and beyond (the ‘A’ refers to the camera; those shot on ‘B’ camera will be labelled #B001 and so forth).
Next up is scene, where (unsurprisingly) the scene number is indicated. Sometimes this might be labelled ‘shot’ instead, or a separate column for the shot number will be added later. What you write here will depend on whether you are shooting the film in Europe or in the USA. More on that in the next section.
The take is self-explanatory and will change depending on the number of times a particular shot is attempted on set.
The Director and the Director of Photography are labelled next, under Director and Camera respectively, and then we get to an interesting part of the clapperboard.
Next to the date is a section that will say ‘Day’, ‘Night’, ‘Filter’ ‘Int’, ‘Ext’, ‘MOS’ and ‘Sync’. Some are self-explanatory, with Day and Night indicating the time-of-day of the particular scene and Filter referring to any modifications to the camera lens that will affect the look of the shot (such as a diopter, which alters the minimum focus distance of the lens). Int and Ext refer to the locale of the scene, standing for Interior and Exterior, respectively, whilst MOS and Sync indicate whether the shot is silent or whether there is an accompanying sound file to sync to it. Aside from Filter, these will usually be hidden with LX (electrical) tape so that those visible are applicable to a particular shot.
Across the Pond… USA vs UK
An interesting aspect of the slate revolves around the differing labelling and counting systems used on sets in the USA and in Europe. In the USA a scene and its corresponding shot – let’s say Scene 1, shot 1 and Scene 1, shot 2 – will be labelled as 1a and 1b on the slate, whilst the European system is a lot less obvious.
Every setup on a European film is called a ‘slate’, beginning with ‘1’ and ascending until the end of the production, so each time the camera is moved for a new shot during a scene, this becomes a new slate. These slate numbers refer to the shooting order of the production, rather than the script, so if scene 24 is the first to be shot, the clapperboard might refer to scene 24, slate 1; scene 24, slate 2 etc. Then, if the next is scene 35, the clapperboard will continue the sequence with scene 35, slate 3; scene 35, slate 4 etc. If you work on an international set with people from both Europe and the USA, expect plenty of debates.
Technique
Let’s discuss penmanship (ie, the best way to write on the clapperboard) and the correct operation of the clapper at the beginning (or end) or a take.
It should be obvious, but it’s surprising how often this has to be said; MAKE YOUR WRITING CLEAR AND LEGIBLE when you are labelling the clapperboard. The numbers should be large, curved and clear so that the person reviewing the footage can easily see the name of the take (hopefully the picture earlier demonstrates this better than words ever could). The amount of times I have seen barely legible scrawl on a clapperboard makes me cry; it’s a waste of everyone’s time.
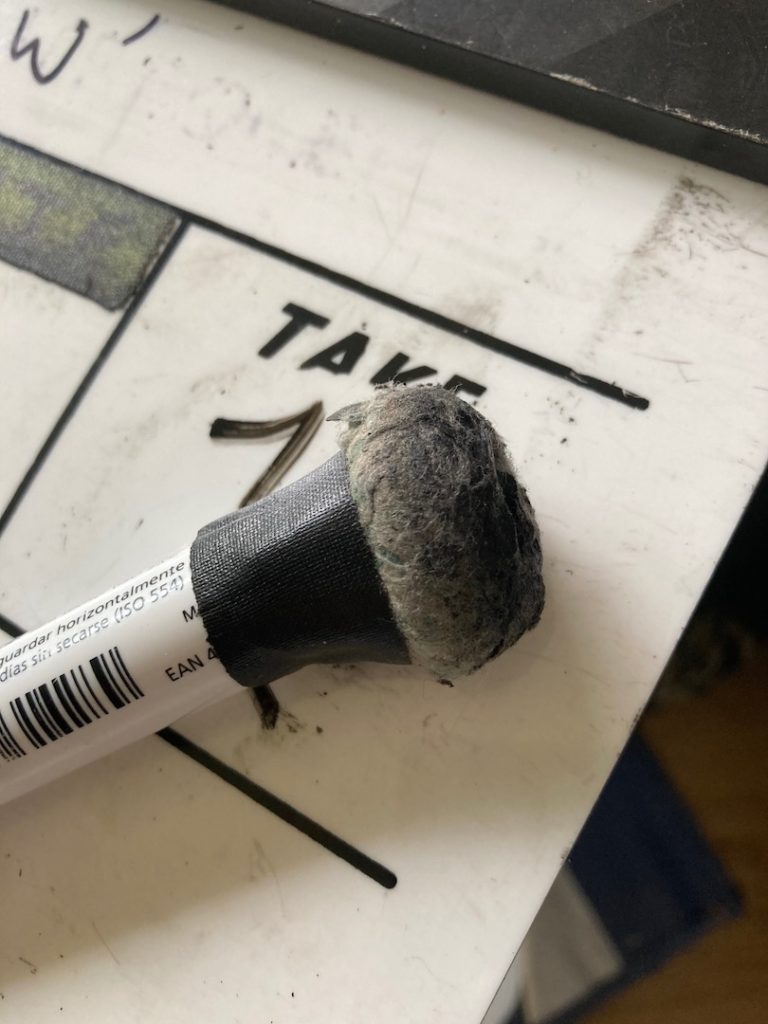
It’s also a good idea to have an eraser ready. Most 2nd ACs I know will have a cloth taped to the end of the pen so that it can quickly be utilised to change the markings on the slate.
Then it’s time for the actual take; at its beginning, the Assistant Director will announce ‘turnover’. The 2nd AC then places the clapperboard in front of the camera with the sticks already open…
…and awaits the sound operator to announce ‘sound recording’ and the camera operator (or 1st AC) to say ‘speed’. Then it is the turn of the 2nd AC to announce the contents of the clapperboard (if it is scene 40, slate 49, take 2 they will simply say ‘49 take two’) and to wait for the 1st AC to ensure the camera is ready for them to ‘mark it’, which is when they close the sticks and give that distinctive clapping noise.
Top Tip: As a rough rule of thumb, to ensure the slate is a good size in the frame, I was taught to stand 5 feet away if a 50mm lens is on the camera, 10 feet away for a 100mm lens etc. …i’m sure you can work out the rest…
If it is a silent shot (ie, no sound is being recorded) you will still use the clapperboard, but with your hands between the board and the sticks and with the label ‘MOS’ visible. The clapping is not required in this instance.
Sometimes, during particularly difficult setups, a ‘tail slate’ is required. This is where the shot is filmed as normal but the clapperboard is used at the end of the take. In this case you go through a similar process, but holding it upside down. (This harks back to the days of film where the shots would be joined together in a row on the original filmstrip, so it was essential to know the relevant frames were before the slate, rather than after it)
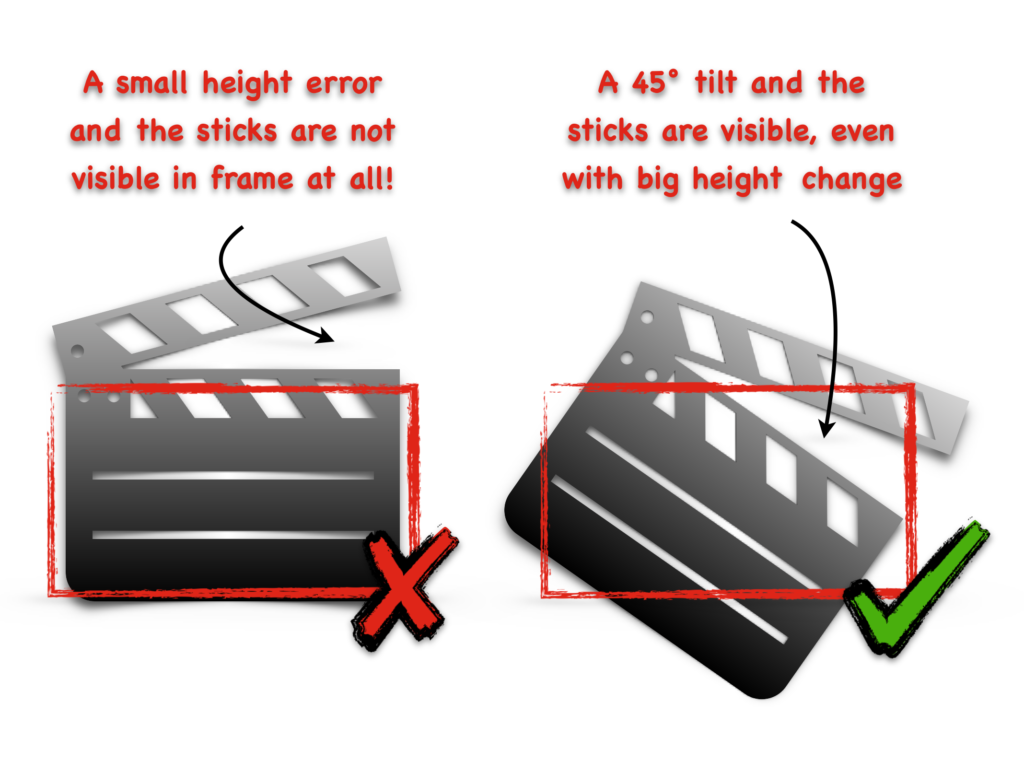
Sometimes a 2nd AC might not be confident that the sticks are visible on camera, so when they are closed the camera does not see the ‘clap’. A good way of avoiding this is to tilt the clapperboard by up-to 45 degrees across the frame when clapping, this way they run at an angle through the frame, greatly increasing the likelihood of them being seen.
Top Tip: With all the tasks required of a 2nd AC, It is easy to forget which take has happened and which is next. You can of course check with the Script Supervisor (and you should be checking you guys are in sync anyway), but a good method is to rub out a small part of the take number after you have clapped. That way, should you find the slate lying around, you will know that its markings indicate a ‘spent’ take and not the next one. Hopefully that makes sense.
Final Thoughts
Who knew there was so much to say about the clapperboard? I certainly didn’t. But now if you are about to head to a film shoot and you are expected to know the ins and outs of the slate, you will be able to give a good go.
If you’re interested in more info on the role of the 2nd AC (Second Assistant Camera) check out this article where we dive deep into this exciting (and challenging) role…
…And if you only remember one thing from this article, then it should be this: write CLEARLY AND LEGIBLY! Everything else should fall into place.
