Long maligned as being an incomprehensible piece of film crew jargon, “Grips” and the kit they use simply refers to any support equipment for the camera, all the way from a simple sandbag, to the most complex motion-controlled robot arm. (Strictly speaking you do get lighting grips as well who rig the support equipment for, you guessed it – lights! …but let’s keep things simple for now) So I think I can safely jump past the most obvious of camera supports – the humble tripod, as i’m sure we’ve all seen one of those before, so let’s jump right into some of the more interesting stuff…
Hi-Hat
You tripod legs are at their shortest and the spreader is as wide as it goes to bring the camera as close to the ground as possible, but it’s not enough… “Can we go lower?” says the Director …Thats where the Hi-Hat comes in… a heavy duty metal (or wood) plate with a bowl adapter to receive the tripod’s fluid head… Admittedly this will mean your lens still ends up a good 12-18” off the ground, but it still gives you full fluid control over pan and tilt. (Any lower and you’ll probably be balancing the cam on a sandbag/beanbag) The base plate is also wide enough so you can dump some sand bags on it or strap it down to keep it super stable if setup somewhere more… unusual.
Slider
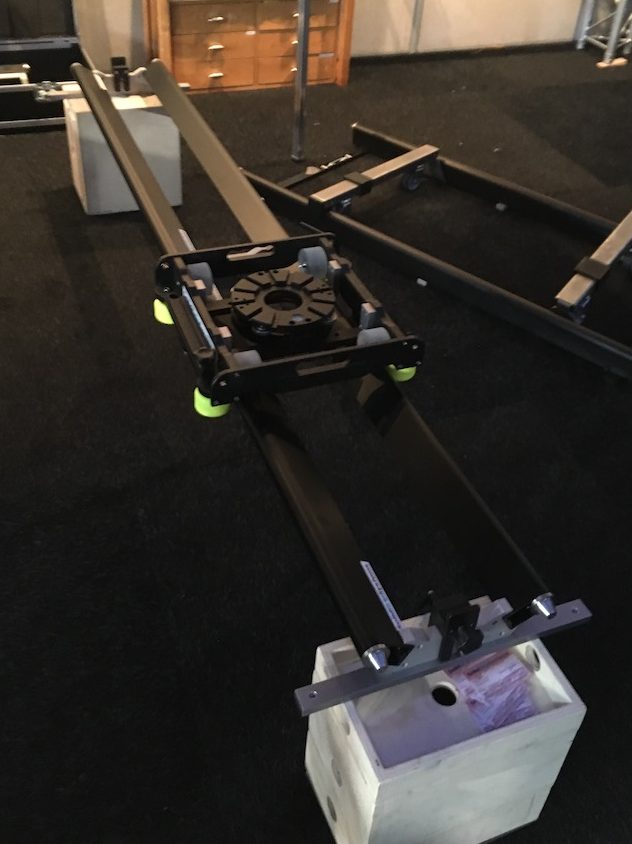
Best used for smaller movements in tighter spaces, sliders can create very smooth linear motion… the heavier the setup, the better (High end sliders are a very solid chunk of Aluminium… easily 15Kg) Adjustable feet for levelling help a lot when used on the ground (many will have a bubble level to help with this), however it is most likely to mount on a tripod to take most of the weight, with monopods on each end. (Larger setups will have a custom base/column solution with a dedicated 3-way leveller) The camera can be very vulnerable like this as there’s an extra axis to lock off – never leave the camera unattended when mounted on track. Due to the relatively short length, there will be limited effect when dollying in/out towards a subject (Though subtle can be good) – However they are arguably better suited for tracking sideways and making use of the parallax effect.
Top Tip: It is very easy to lose the low-profile nut that screws the fluid head to the carriage, so pay close attention to where you put it down when switching to/from sticks (tripod) and the slider.
Dolly
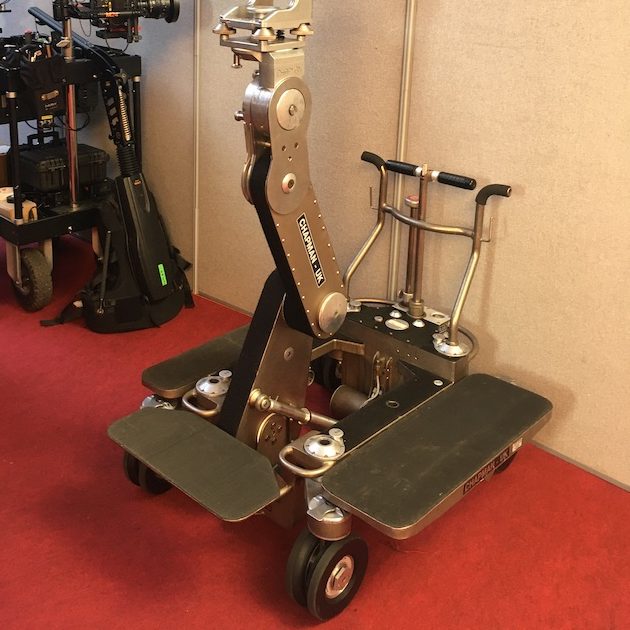
This steerable, ride-on platform has smooth tyres (Like a go-kart) and is fantastic for long movements on very flat surfaces… e.g. concrete hallways, gymnasiums etc. A variant specifically designed with removable side panels to allow it to fit through a standard doorframe (3’6” / 76cm) is called a “Doorway Dolly.”
If it is to be used outside, or on rougher terrain, it will be necessary to use sheets of Plywood (or similar) to create a level surface. Just be careful to support them properly and pay attention to the transitions between sheets where bumps will easily be transferred to the camera. The Dolly platform will have a height-adjustable central column and a bowl-adapter to receive the fluid head, onto which the camera sits. There should also (but not always) be a seat for the operator to sit on, meaning that it is a minimum 2-person job to use it.
Fixed Track – Links, Pags, Wedges
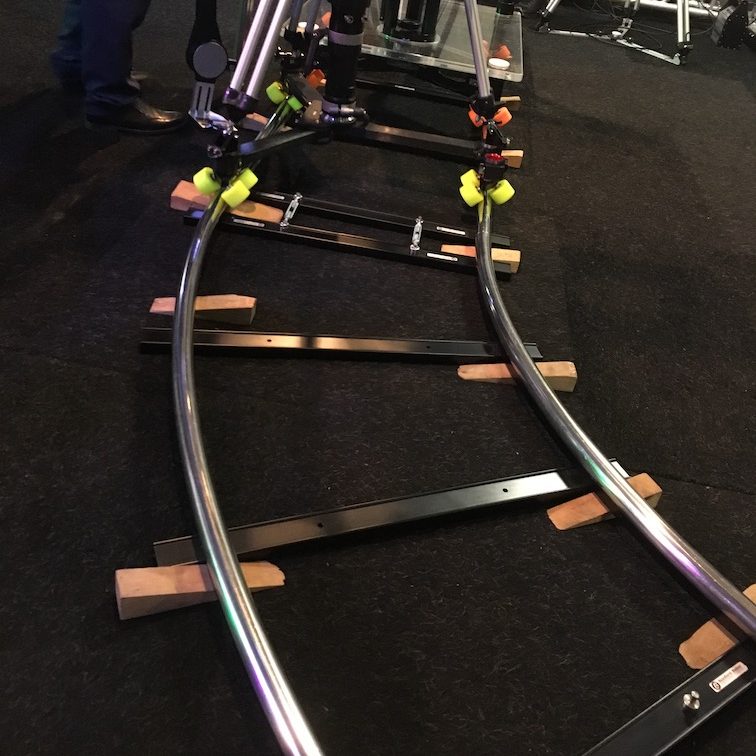
Now here is the middle ground between Sliders and bigger Dollys… The track can be made any length you like, as long as you have enough sections (just like a train set) and comes in both straight and curved sections to create very smooth, complex and (mostly) repeatable camera moves. The main disadvantage is that the track itself can become an obstacle to both your actors and the camera’s field of view, so careful planning of shots is needed beforehand to mitigate these issues. The sections of track are tightly held together with bottle-screws. If used on an uneven surface or incline, then it will be necessary to use a combination of Pags (Paganini) and Wedges at multiple points along the length to ensure every part is well supported.
SteadiCam
A car pulls up, two people get out, dressed in formal evening wear, we follow them across the street, into a hotel, past the doorman, down the stairs, through a maze of kitchens, corridors and hallways and eventually into a private club called the “Copacabana” – This is undeniably one of the most famous long-takes in cinema history, from 1990’s “Goodfellas” – so instantly recognisable it is widely known as “The Copa Shot” …It would have been impossible without the invention of the Steadicam… and the highly-skilled operator driving this simple, but extremely effective technical marvel.
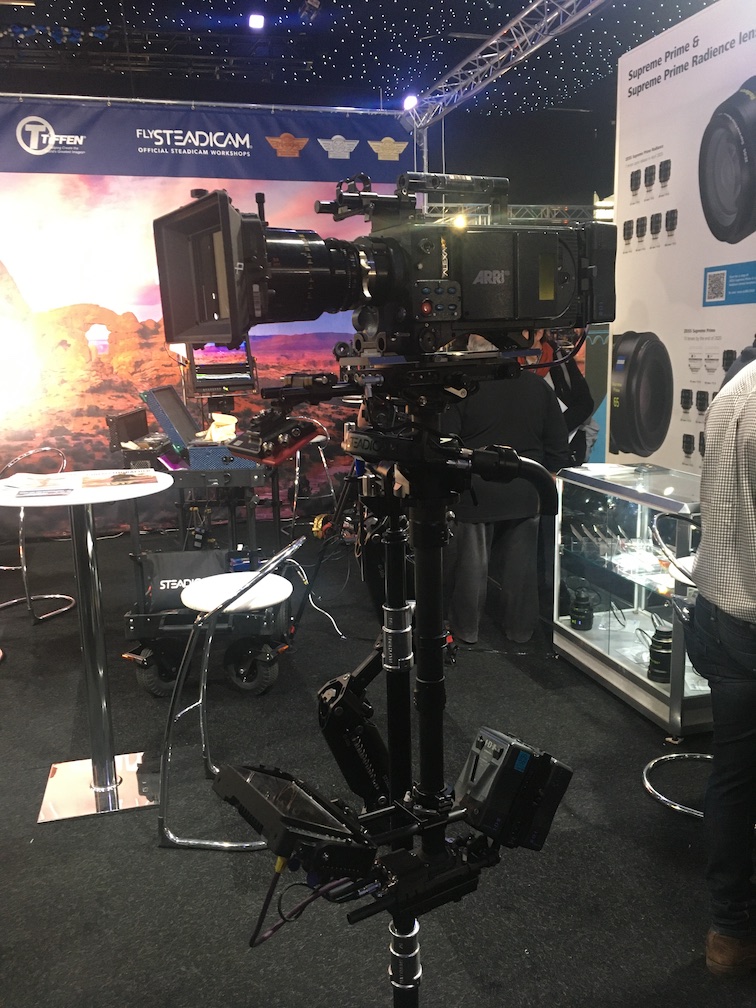
Special training is required to make the most of this expensive equipment, as is physical strength, stamina and attention to detail – hence why Steadicam operators are some of the highest-paid crew members in the industry.
Though there may be some rivalry, it is still complimentary to the new kids on the block: motorised Gimbals. Though they are both ways of creating smooth stable camera motion with greater freedom, Steadicam footage has a different look to that shot using a gimbal. The sprung arm is dampened to reduce vertical motion as much as possible, while the column has a pivot point below the axis of the lens – this leads to a more organic / floaty look… with a little sway. The main advantage is that, once set up, the unit is self-balancing… i.e. No motors and batteries so there are fewer moving parts to worry about – which inevitably means there is less to go wrong and therefore is a more reliable solution than powered gimbal setups. Just make sure to give your operator plenty of breaks, as it is very physically demanding work.
Jib (Crane) / Moving Head
A classic way to show the audience that a character is at a low point in their journey or is weak/vulnerable is to shoot them from above… so they appear small in comparison to the world around them (a little fish in a big pond) – so you can obviously just go and find a building and climb the stairs… but what if you want to transition between the two… to get a bit of movement and dynamism into your film.
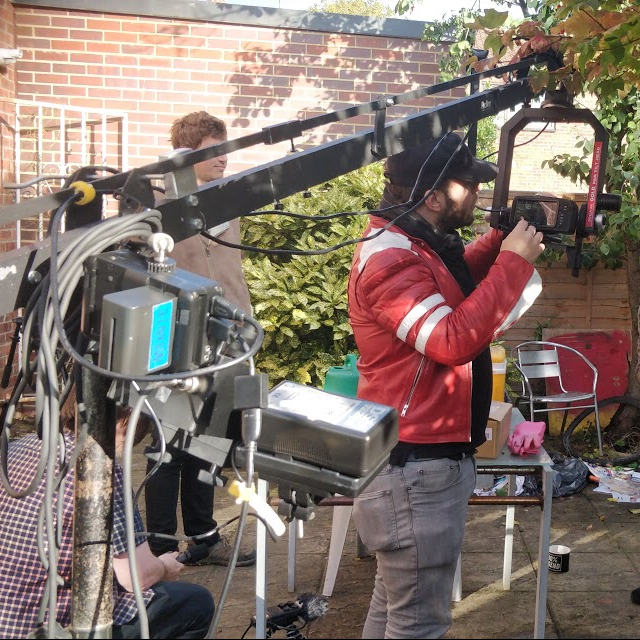
Wider shots where the subject is a great distance from the camera are now typically being covered by another piece of kit (further down this list) however there are situations where a jib is still the better option – small-medium spaces where sound and wind (from noisy rotors) would make shooting totally impossible – basically anything with dialogue. Roger Deakins often uses a small jib for interior dialogue scenes as it makes moving the camera around and changing heights much quicker and easier than constantly lugging tripods around.
So once you have stuck your camera on the end of a giant pole… how do you control where it is pointing? Depending on the complexity of the equipment, (ie. the budget of the production) this one straddles between the worlds of passive (muscle-power) and active (motorised) kit.
The simplest jibs have two bars that work in a parallelogram to keep the platform at the top level. (Most also allow the link between these to be severed, so that you can manually adjust the on-axis tilt of the platform. Though this sounds great… you will quickly see how limiting this can be for anything other than straight-on shots where the subject is directly in front or below the camera. Anything with panning will require swinging the whole jib arm around (not so great in a tight space) or going to the next step…
A moving head (either cable or motor operated) allows for full pan/tilt operation so you can sweep the arm in a big arc around over the top of your subject while keeping them exactly where you want them in the frame. Safety is definitely a major concern here as the whole assembly is flying around over peoples heads without protection and it has some serious weight behind it – so sufficed to say this is not a 1 person job. You will definitely need separate people to operate the jib arm and the moving head (and probably a focus-puller with wireless follow focus as well).
There are two main types of operation for motorised moving heads – joysticks or wheels. There is no right or wrong way, it just comes down to what individuals prefer or find more natural to operate.
Top Tips:
1) Beware the arc of the crane in both the horizontal and vertical. Because the arm swings around a central pivot, it does not move the camera in a straight line, so you will need to compensate for or plan this into any shots. 2) Though the motors can be a bit stronger than those used in Gimbals, it is still necessary to make sure the centre of gravity of your camera rig is aligned to the centre of the axes of the moving head to keep it all balanced. This will ensure smoother operation and longer battery life.
Gimbal (+ Easyrig)
Even though they are a relatively recent addition, everyone seems to have gone crazy for these in the last few years… as though they are some sort of magic bullet to instantly make your film look more professional – and in the right hands, once many other potentially more important factors have been taken into account (eg. Story, Performance, Lighting, Set design, Make up etc.) this might be true.
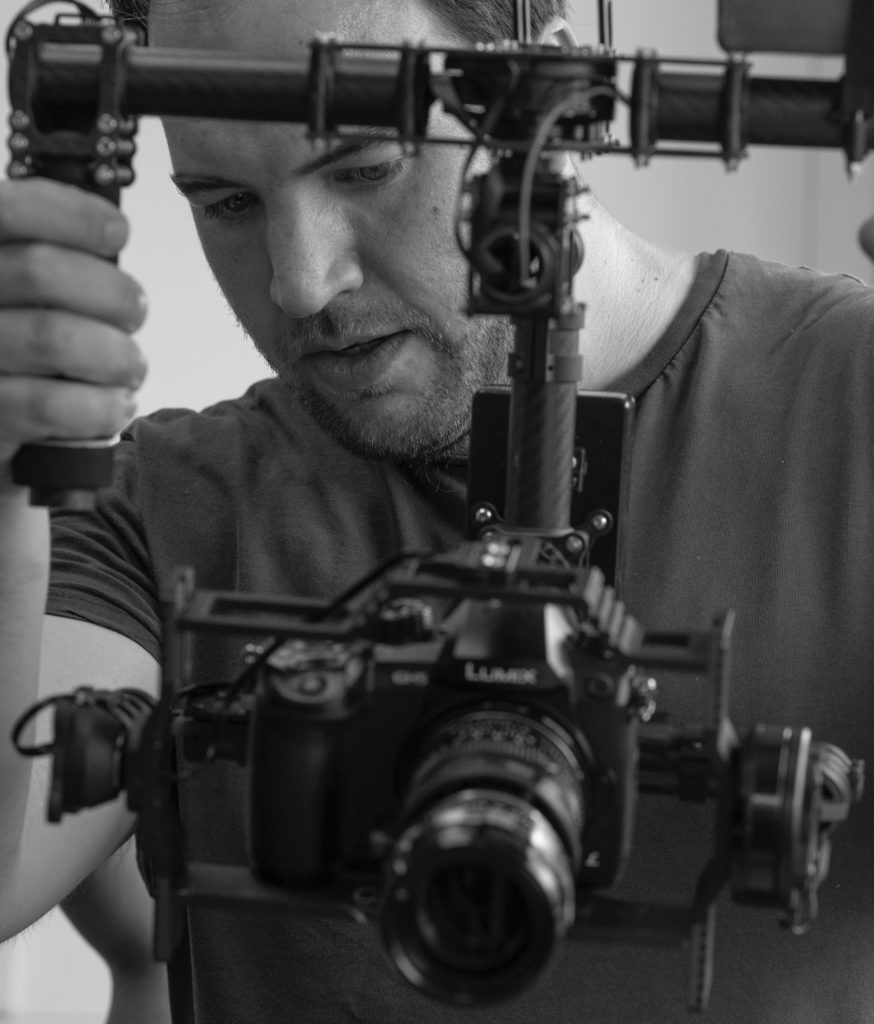
As mentioned before, there has historically been something of a rivalry between traditional Steadicam and Motorised Gimbals – Neither method is better or worse, they are just two tools for different jobs.
The floaty look of a Steadicam combined with its reliability make it great for longer periods of shooting, perhaps in more remote locations, where the organic movement of the operator in relation to the subjects is desirable.
Gimbals however use brushless DC motors, Inertial measurement units (IMU) and a a micro-controller to actively stabilise the camera. Perfect balance of the camera in all three axis during setup is highly recommended to reduce the strain on the motors.
As the camera lens is pretty much directly on the axis of rotation, with the stabilisation and pan/tilt done by a computer chip, the look can also be described as slightly more “robotic” (Especially when panning) – and handhelds unit will bob slightly as you walk along with them – rather like a first-person perspective computer game. It’s difficult to put into words… but a quick side-by-side comparison will make things a little clearer.
There are numerous proprietary, branded versions out there (Movi, Ronin etc) however there is also a large DIY community using the Alexmos/SimpleBGC chipsets that are fully open and customisable so there is nothing stopping you from building your own rigs both small and large. The potential for custom rigs makes all sorts of complicated camera moves possible, through very tight spaces, incorporating hand-offs between operators and even onto other grip equipment. (e.g. cranes)
Smaller units are designed to be handheld, and so will give you very tired arms pretty quickly – to alleviate this you often see them paired with an EasyRig / ReadyRig – A rigid vest with support arms and repelling cords, that transfer the weight onto the operators back. (Some even have sprung/dampened arms to reduce the bob as you walk along)
The latest evolution in this field is moving to combine the two technologies into one setup – the first to appear is called a “Trinity”. (A steadicam style rig with a gimbal stabilised camera mounted on the top) The recent Sam Mendez directed “1917” makes constant use of this setup to achieve astonishing results through the trenches, across the hellscape of WW1 no-mans land and beyond. (Roger Deaking strikes again!)
Drones
No.1 Xmas gift item – the quintessential 21st Century man-child toy right? (No offence intended to any female or non-binary folks who also like their gadgets) It’s quite impressive how quickly these have dominated the video world these last few years, with the cameras and features constantly improving all the time. (Though they have been around a little longer in film, obviously for cost reasons) The drop in price has put these into the hands of an exponentially larger user base, and so naturally there has been a response from the authorities to ensure safety around airports etc – basically if you’re going to be flying these for commercial purposes in USA, Canada, UK etc. you’re going to need some kind of a license <article>
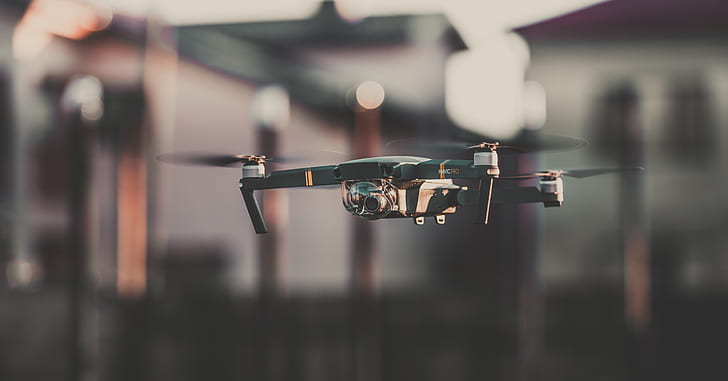
When it comes to true film making, there is still a divide though as most consumer units are rather limited on range, flight-time, top speed, have a fixed aperture, fixed focal length lens and limited dynamic range – so only really good for a few wider landscapes and establishing shots etc. (Also photogrammetry…) Something else to consider is that most Pro Drones require two people to operate them… a pilot and gimbal operator – like with a Jib/Crane with a moving head – a feature that is mostly missing on consumer units.
Currently they are also rather problematic for close-up work as you’ll see the wind/draft they creates… and those rotors spinning around create loads of noise, making recording dialogue nigh on impossible.
Personally I expect to see some of these limitations change a lot in the next few years as the manufacturers realise the best way to sell new products is to increase the quality of the footage they produce, using more lens options and improved dynamic range rather than pixel count as the new must-have features… This has already started with units like the DJI Mavic 2 Pro & Zoom… and i’m sure the next Generation will take things even further.
TechnoCrane / AquaCrane / Motion Control
Now we’re getting into some serious kit. Some of the most impressive shots in cinema history – especially those invlolving long takes were achieved using telescopic cranes. The magic of these is their ability to smoothly alter a counterweighted arm’s length, allowing you to precisely adjust both the position and rotation of the camera anywhere within the three dimensional hemisphere covered by the crane. As a highly specialised piece of kit, they need to be set up and operated by trained professionals… which, combined with their size and precision engineering also make them one of the most expensive options on this list… but also one of the most versatile.
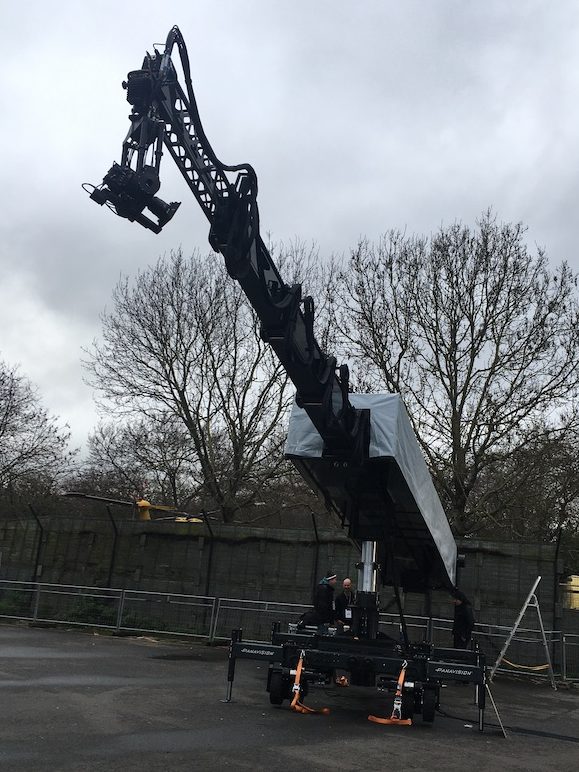
An Aquacrane is basically the same thing, but I’m sure you can guess what it’s speciality might be? That’s right, if you find yourself on the next James Cameron epic where over 50% of the film takes place near, in or even under water… the precision engineering I mentioned previously needs to be able to cope with these harsh and challenging conditions both effectively and safely.
Moving around such heavy equipment can (and was originally) done by muscle power alone… but these devices now include at least some powered elements in them. Taking this a step further moves us into fully powered devices which, when combined with some feedback sensors and a computer can create full automation… typically called “motion-control” where your camera rig is now basically a fully fledged robot arm capable of reliable, repeatable, millimetre-precise movements. These can be used for all sorts of creative shots requiring compositing of multiple passes (eg. Miniature SFX work) or where the camera matches a performers movements (eg. Music videos) to full-on time-dilation, where the camera’s movement can be sped-up/slowed down in time with it’s recording frame rate, all while moving through the action. Impressive stuff!
Cable system / SpiderCam
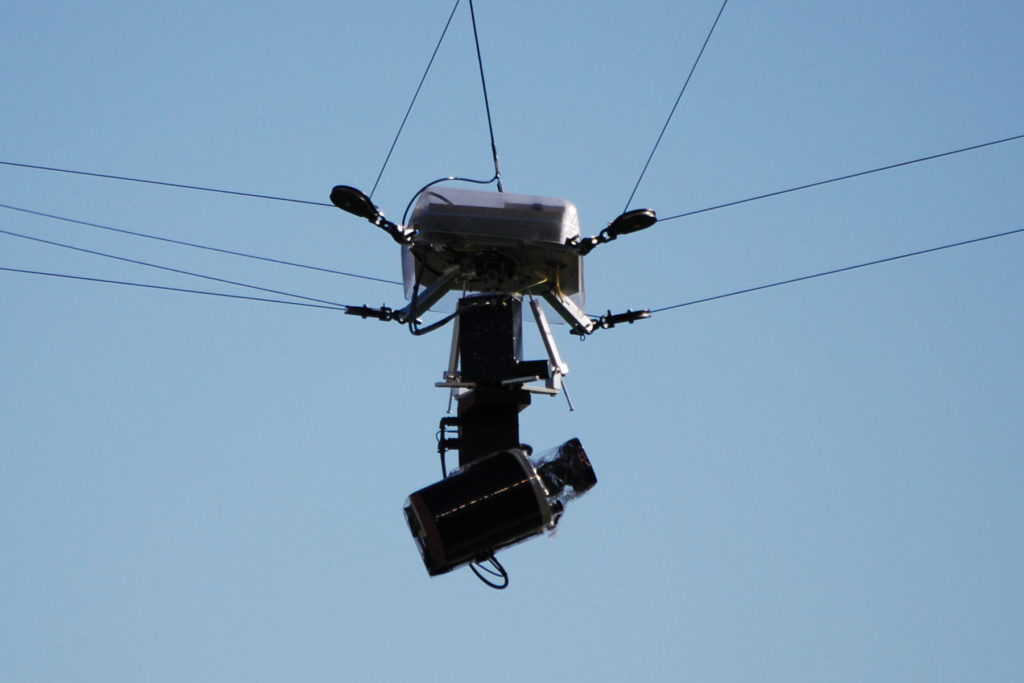
Need a straight run over a long distance looking down on something… somewhere you can’t put a crane/Jib (maybe inside an old factory or hospital corridor … or its too windy for a Drone, eg. Mountain-top cliff-hanger anyone? The manual option using steel cables and bike wheels… good for dialogue scenes or nature as it’s very quiet. The much more advanced setups are fully motorised for higher / more controllable speed – think mission impossible – i.e. Tom Cruise having a cardio workout, running full speed through explosions where timing is absolutely critical. Even more advanced is the Spider-Cam which has at least three axes of cables and computer-control to position it in 3 dimension by altering the length of individual cables – super specialised and used heavily in sport to capture fast paced action that is constantly moving.
Bonus: Apple Crates
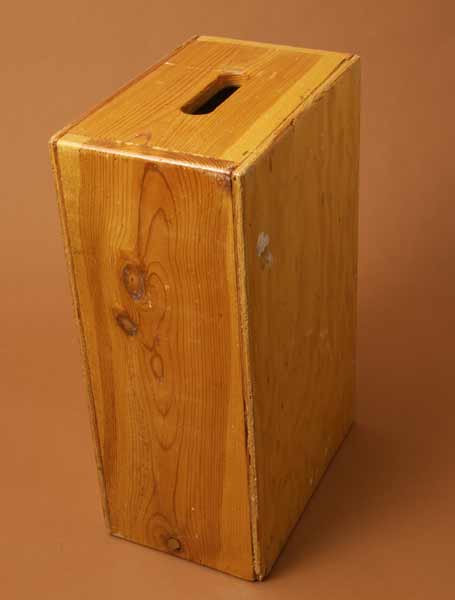
Not strictly an item of Grip as the camera does not mount to these, but they are definitely worth mentioning as they have so many uses. Coming in a bunch of sizes, these incredibly solid boxes made from PlyWood are the multipurpose workhorse of the filming world, whether propping up the end of a slider, to making an actor 2 inches taller, to providing a well needed low down seat for a weary camera operator, who’s knees would rather not be ground red-raw on the uneven rocky surface underfoot.
